Wednesday 28 December 2016

Do people do this when it`s frosty?

Hello again, its that funny time in between Christmas and New Year when people who are not working find themselves at a lose end. I am sharing a card which I have made as part of a DT project and although I don't know any golfers I just love the bright colours on the background paper and I put it in because it reminded me of the old fashioned plus 4s and Argyle sweaters that golfers used to wear.


what I used:
Crafters Companion, Die`sire Edge`ables, Hole in One die
Serif Craft Artist, Eye Candy, materials printed paper
Serif Craft Artist, Banner Lite for sentiment
red & black card scraps from stash
good quality white card to print onto and use with dies
Tim Holtz distress ink pads to use as paints - Bundled Sage, Shabby Shutters, Cracked Pistachio,
Twisted Citron, Mowed Lawn, Vintage Photo
blue pastel chalk for sky
Pebeo silver gilding wax for golf clubs
red and yellow pens for colouring in flag and bunker
13mm & 5mm red satin ribbon
black pen or ink pad to mark around flag
 
A really easy card to make and colour in and well worth a go if you have a golfer with a special occasion.
 
............................................................................

 
Its a really frosty start this morning and this was the view from my craft room an hour or so ago, I just love the crisp winter days. This time in between Christmas and the New Year is a bit boring (Im`m not complaining as I am lucky enough to be on holiday), I usually throw myself into some crafting but as I`m waiting for a die cutting machine to be delivered (hopefully today) I am at a bit of a lose end. I have 3 birthday cards to make for friends before 16th January and I have 3 projects to make for Crafters Companion before 9th January so I am really hoping that my Cuttlebug arrives today.


Monday 26 December 2016

Roll on New Years Eve

I`m sorry I haven't been posting here lately but I had a problem with Blogger (I couldn't find my blog  dashboard for a while) and then it was full steam ahead to Christmas. The next big event on the calendar is New Years Eve so here is a card I made as a DT project for Crafters Companion and if you are having a party this could be a perfect invitation card.

 
what you need:
Crafters Companion Die`sire Edgeables Cocktail Club dies
Serif Craft Artist, Evening Sky backing paper
Serif Craft Artist Troutkings BTF font for sentiment
6" x 6" white base card
plum card
good quality 210gsm white mat paper to print onto
white card to use with die and as mat and layer for sentiment
Sakura silver glitter pen
Stickles - Crystal & Xmas Red
glitzy lilac organza ribbon 4cm wide
pink satin ribbon 7mm wide
assorted lilac sequins
pens to colour the cocktail and lemon
 
This card is a bit tricky as you really need to plan where the little flying umbrellas need to go. The sentiment was written in white and overlaid onto the background in the graphics program and then printed out. Having said that I think it is quite eye catching and well worth a go.
 
.............................................................
 
Its been a bit traumatic here on the crafting front as I couldn't access my blog for a while and then my die cutting machine broke on 23/12 and I had been given 6 dies to make samples with before 29/12. I ordered a new machine but it won`t be delivered till 29/12 so I will have to send the dies back and apologise for failing with a commission. I was very upset at first but then realised that I would be free to enjoy my Christmas as I would have time on my hands. So that's what I`m doing having a little rest and enjoying my free time. I hope you all have had a fabulous Christmas and now that its all over for another year you can enjoy the rest of your holiday if you are lucky enough to get time off work.
 
I am not going to a party on New Years Eve (my friends back in Bradford call it Old Years Night) but I will be staying up for the "first footing", a tradition associated with Scotland but my Mother although not Scottish was deeply superstitious and always made my Dad do it and I carry it on now. If you`re not familiar with this tradition a dark haired man must cross the threshold of the house with a piece of coal and a piece of silver after midnight to ensure wealth and warmth for the future year. 


Thursday 1 December 2016

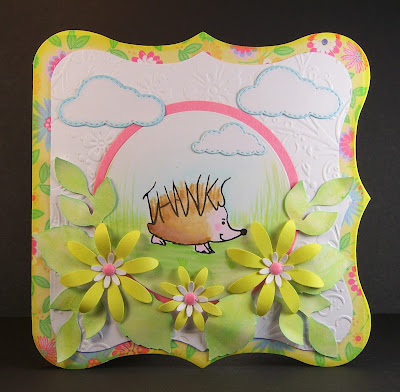
A very thankful little Hedgehog

Hello crafty people on this frosty winters day, I am sharing a sunny looking card with you. It is a sample card I made a while ago for LC Designs and this week they have released for sale this cutie little Hedgehog stamp which has changeable words that make up his prickles. I chose to use the THANKS word as I find it`s always useful to have a few "thank you" cards on stand by especially after Christmas.
 
 
what I used:
Diesire create a card dies
Crafters Companion, Floral Delight embossing folder
Crafters Companion, English Country Garden, Grad Floral dies
Memory Box stitched cloud (style 99506)
Tattered Lace, essentials circles dies
small hole punch
Tonic small flower boot punch
paper leaves
6" x 6" base card
yellow floral paper from stash
white card to stamp onto and emboss onto
pink paper
 
This card has a lot of elements to it but it is fun to make. I had my first real play with my Brother Scan n Cut machine to make the leaves on this card, I am really pleased with them but if I hadn't been using that I would have made them with a die.
As always I coloured my card using water based paints and Tim Hotz distress inks.
 
............................................................................................
 
I read a post on FB the other day saying only 3 more Mondays till Christmas and this put me in a bit of a spin as 3 weeks is far too soon for all the things I have to do, but then Christmas Day is on a Sunday so it is really 4 weeks (phew that one week makes all the difference). Today I will be making my Christmas cake as its a cold day and a good time to have the oven on for a couple of hours, its a bit late in the day as I usually make mine in October but better late than never. I am feeling really festive this year and as we are finally into December I will indulge my Christmassy feelings with a bit of seasonal music whilst making my cake. I have seen a funny video on FB showing naughty cats climbing Christmas trees and I dread to think how my two little kittie live wires will react to ours when it goes up, I think we will be shouting timber a lot.
Whatever you are doing today I hope you have fun and stay warm.


Tuesday 22 November 2016

A bit of therapy

Hello crafty friends, I hope you are all well and managed to survive the storm of the past couple of days. It was such a wet and dark day yesterday that the only thing to do was to lock myself away in my craft room and this card is what happened. I have never done any "adult colouring in" before and a miserable day was a good day to start because it is so relaxing and therapeutic to do. I used all my Spectrum Aqua pens, all my Tim Holtz distress inks (as paints using a water brush) and a few pens I had forgotten about and they were strewn all over my desk like a riot of colour, how could the weather get me down when I had my own rainbow right on my work desk.


what I used:
Craftters Companion Crafters Inspiration issue 12 free CD
every Spectrum Aqua, Tim Holts distress ink and any other colours you can get hold of
black card
purple card
Craft Artist Crazy Girl Blond - for the sentiments
1cm burgundy organza ribbon
1cm AB dazzler
stickles crystal glitter glue

The image is on the CD and I edited it to exclude some flowers that I didn't want and generally made it more of a shape that would fit my card and just printed it out onto Hobbycraft white card.
OK this card is easy peasy to make, the colouring in took a while but it was so relaxing to do I didn't notice the time going by and I kept leaving it and then coming back to it as life doesn't always stop for crafting. I used all water based ink on this card as its what I`m used to and I would suggest that whatever you use make sure that it`s all the same format throughout the colouring in process. Having said that I did  I use a black alcohol pen to colour the background in once the colours were completely dry.
The sentiment was made in my Craft Artist graphics program and I typed the words, made them a suitable size, set the wording inside a lilac box and printed them out.
The rest of the card is just mat and layering and general jazzing up with glitter and ribbon.

...................................................................................

This card is for my sister who has a Birthday in December and she does adult colouring in all the time but never makes anything with her artwork so I thought I would show her via this card that she could be sharing her art with her friends (I have gotten her a sweary colouring in book for Christmas but I don't think she will be making cards with that).
and now for something completely different - I have wanted a camera tripod ever since I first started taking pictures of my cards but I wasn't sure if the screw on the tripod would fit my camera as my camera is tiny. Last week when I was doing my afternoon in the Lincolnshire Trust For Cats shop they had a tripod for sale for £5 so I bought it and hay presto it fits my little camera. I feel so much more professional now that I am not balancing the camera on a box, on a piece of polystyrene, on a fold away table and it saves me time setting up a shoot. So I just have to make more cards so that I can play with my new tripod toy, such a good investment I should have bought one years ago.
Whatever you decide to do with your day I hope you stay safe and dry and happy (I`m off to do some house work now so not much happiness there until its over).


Wednesday 9 November 2016

Famous for 15 seconds

Good morning Crafty friends, today I am sharing another card which I made to launch the Crafters Companion Catitudes collection as it is still showing on Hochanda as a "one day special". I watched the show last night when they began the launch and I had my 15 seconds of fame because this card was at the front of the main display and got quite a lot of air time. I have to say that I didn't know the prices for any of the things I used when I was making the cards but after seeing the show I think everything is good value for money but especially the stamps (I haven't got the stamps so I may have purchase them today but don't tell hubby).


what I used:
Catitude CD (topper 73) 
Catitudes Heart Balloons die
Catitudes Delicate Florals embossing folder
Catitudes paper pad
6" x 6" base card
good quality 210gsm mat print paper
blue pearl card with white core
red card & black card
ring binder punch
Glossy Accents
5mm red satin ribbon
red embroidery thread

This card is quite simple as it is just printing off the image, a bit of embossing and then mat and layering.
The fancy pattern at the bottom of the card is made by embossing the blue pearl card and cutting out both ends of the design, then rub the design with a sanding block to reveal the inner white core (this is a lovely technique as the card feels like velvet flock after the core is exposed). Stick the two pieces of card together on the reverse with tape and cut to size.
The heart balloons were cut from red card, I used the embroidery thread to make the strings and when the balloons were stuck onto the card I covered them with Glossy Accents.

.................................................................................... 

Well after an exciting night watching my cards (and the rest of the teams fabulous cards) on TV I then watched a film so it was a late night for me and as the weather man had predicted snow over night I wasn't sure what I would wake up to this morning. The snow didn't arrive here in Lincolnshire but I have seen some pictures from my family in Yorkshire and they have had a bit of the white stuff and a scary trip into work this morning. I hope you are safe and snug today and keeping warm.

Tuesday 8 November 2016

My dream job

Hello crafty friends, today I am so excited to be able to share with you my first Crafters Companion project. This is 1 of 9 cards that I have made using the Catitude crafting suite which consists of dies, embossing folders, stamps and digi stamps, a super fantastic CD ROM and a book of top quality backing papers. The Catitudes collection is launched today on Hochanda as a "one day special" and I can tell you now that this project was a dream job for me to work on because as you know I love cats, fashion/style (although I lack it personally) and crafting and it is all rolled up in this amazing set. I do hope my cards get an airing on the TV but I have seen the other projects made by my DT buddies and they are amazing and well worth a look at on the Crafters Companion Pinterest page.


what I used:
Crafters Companion Catitudes CD - topper 83 & sentiment 15 (re sized with graphics program)
Catitudes Perfect Patterns embossing folder
Catitudes paper pad (for flowers)
Crafters Companion Signature Collection, English Country Garden, Grand Floral dies
6" x 6" white base card
circle dies to make the hoop frame
green card & white pearl card
good quality 210gsm mat print paper
blue & green bakers twine and jute twine
pearl embellishment, small cotton bobbin & blue satin bow

This card is all about the finishing touches and the image is so lovely you couldn't really go wrong. The only bit that you have to think about is making sure that the printed image fits inside the smallest circle die that you will be using to make the frame.
The frame is made using the pearl card and two circle dies  and then wrapping the twines around it once it is cut out.
The pattern on the embossing folder is so classy and really pops when used on the pearl card.

Yes I would definitely send this card to myself, it ticks all my boxes.

.................................................................................................

I have been waiting what seems like such a long time to share this Catitudes collection with you and it has been a real test for me because I love it so much and had such a fantastic crafty time making all the samples. I am eagerly awaiting my next project which I think will be with me this week but it will take a lot to beat Catitudes.
I have to go into work tomorrow for an allergen training course and snow is forecast here in Lincolnshire so I hope it waits till I`m safe home or even better doesn't snow at all. I hate driving in snow ever since I got stuck on an icy hill a few years ago and had to watch whilst lots of cars skidded into each other all around me, that was the year when they ran out of grit and didn't grit the roads. I hope you all keep safe and warm and snow free (unless you like snow and then you can have mine).


Thursday 3 November 2016

You don`t see many of these in November

Hello, it`s frosty out this morning and as we get further on into Autumn I think the only Butterflies to be seen will be on cards like this one. This is another card I have made using the new LC Designs Dinkie 3D Butterfly stamp. I love the bright colours of Butterflies and so I decided to paint this one in rainbow colours.


what I used:
small butterfly stamp
small sentiment stamp
VersaMark ink pad
5 1/4" base card
yellow & craft card & small piece of gold card from stash
open weave hessian type fabric
watercolour paper
gold embossing powder
gold Liquid Pearls
2 x brass brads
 
Stamp the 3D Butterfly and heat emboss using the gold embossing powder on water colour paper, then colour it using watercolours and a water brush (Spectrum Aqua).
The background layer of Butterflies is also made by heat embossing the gold embossing powder onto craft card.
Cut the embossed pieces to size and add gold Liquid Pearls to the edges.
Mat and layer the various components to create the card.
Finally add the sentiment which has been heat embossed onto gold card and brass brads added.
 
..........................................................................
 
 
The quilting fabric sale that I went to earlier on this week was a lovely day out with my friend but I only managed to spend £2, mind you I did seem to get quite a lot for my money but I felt a bit of a failure as it was to raise funds for the Lincolnshire Cat Trust. Today I have a free day and I am hoping to get some Christmas cards made to send out this year as it always seems to be a last minute push with my personal Christmas cards. My craft table is right under a big window and although its lovely to look out from its quite chilly now that the weather has turned frosty and I find my fingers get quite cold so I have invested in some fingerless gloves but I have no doubt that when I start gluing things they may have to come off. I hope you have a productive day today and manage to stay warm.


Saturday 29 October 2016

Absence makes the heart grow fonder

Hello, long time no see. I`m sorry I haven't ben blogging much these past few weeks but I`ve been busy doing crafty things that I cant really talk about right now but when Crafters Companion launch the product I have been working on I will be blogging a lot.
LC Designs released a new stamp this week and is a Butterfly stamp (you know how I feel about Butterflies) and this is a card that I have made to help them promote it.


what was used:
blue, light blue and green inks
craft card
white card
small clear faceted gems
beige embroidery thread
small butterfly punch
Tim Holts distress inks - Tumbled Glass & Vintage Photo
Glamour Dust glitter
 
This is such an easy card to make as it is all about the coordinating coloured Butterflies and once that is done its simple construction but even the stamping of the Butterflies is pain free because there is no colouring in just shading with the same ink pad and a fine paint brush.
To finish the card I added Glamour dust to the Butterfly and gems.
 
.................................................................................................................
 
Today the weather is still and dull, the trees all around are losing their leaves and looking more skeletal every day. Yesterday it was really warm and sunny and I managed to get out into the garden and cut the grass (hopefully for the last time this year). I love Autumn but the garden does always look sad and tatty and after tomorrow nights Halloween it will be full steam ahead to Christmas. I am going to a material sale on Tuesday and as fabric is my other crafty passion I cant wait. A lady in the next village is giving up sewing and selling off her lifetimes collection of patchwork fabric, I cant wait to meet her and perhaps pick up some crafty sewing tips not to mention a bargain or two (although I don't know that I have room to store any more fabric). Enjoy your weekend my friends and don't forget to put your clocks back tonight and enjoy an extra hour in bed.


Wednesday 12 October 2016

A card I never wanted to make

Hello crafty friends, today I am sharing a card that I said I never would make - a bereavement card. I always thought it would be depressing to spend time thinking about and making a bereavement card but a good friend lost her husband last weekend and as she knows I make cards I thought it would be disrespectful to her husband if I bought one. I had to do the thing I said I never would and I didn't know where to start as it has to be respectful but not morbid. I bought the angel wings by mistake a month or so ago and they were just the right image for this card as it turns out. I hope you never need to make this kind of card but if you do then this one is really quick and easy to do.


what I used:
Tattered Lace Angel Wings die
Tonic heart punch
small hole punch
dull gold card
mink pearl card
red card
dark cream parchement card
Thinking of you gold peel off sentiment
5mm red satin ribbon

The card is really just mat and layering and very easy to construct. My finished card measures 15.1cm x 9.6cm but as I make my cards to fit the image it is not a standard size and I have made the envelope myself from brown paper.
The angel wings are cut from the gold card, I cut the wings apart to make a better space to place the red heart.
The red heart is punched from the red card and then shaped with a ball tool to give it dimension, I stuck the heart on to the card using hot glue to fill the void and give it stability.
The small red dots which I made with the small hole punch have also been worked with a ball tool to make them look more like brads and again give them dimension.

...................................................................................................

I don't know if its the fact that the weather has been a bit grey and wet lately but I have been feeling a bit lost as far as my crafty mojo is conscerned. I have done the usual of looking on Pinterest and watching the various craft channels to pep me up and in the process I have ordered a Brother scan n cut (naughty me). I have wanted a scan n cut for about two years now but could never justify the cost however I saw a fantastic deal on Create and Craft and couldn't resist, so now I am eagerly awaiting the delivery van. Yesterday a white van came up and down the little road I live on about five times, he was obviously lost and I kept thinking to myself he`s looking for my house. Eventually he revearsed down the drive and I ran out with a big grin on my face and quite startled the poor man who was lost and looking for someone else two houses away. I`m still awaiting my white van man but when he does deliver my scan n cut I am going to lock myself away in my craft room for the rest of the year making fantastic things. Well that's how it plays out in my head but I think the reality will involve a big bag of things that didn't quite work out, still it will be great fun - can`t wait.


Wednesday 5 October 2016

Little girls grow up so fast

Hello, today I am sharing with you a card my friend asked me to make for her daughters 18th birthday. Her daughter loves horses and so this sweet little art pad image from Lili of the Valley was the first one I thought of. The brief was must say "happy 18th", must be horsey themed, must be larger than 6" x 6" and this card is 8" x 8" so I think I covered the brief.

 
what I used:
Lili of the Valley set 26 Here Comes Annabel art pad
8" x 8" white base card
NitWit Lovestruck Too downloaded paper pad
red paper to mat and layer
pink/red, green & teal paper/card scraps
good quality mat print paper
Crafters Companion Signature Collection Pretty Petals dies
Marianne Designs LR0271 leaf swirl die
2 x small flower punches
ring binder hole punch
Glamour Dust glitter
heavy lace & pink gingham ribbon
pearl embellishments and small pearl heart
 
This is a fairly straight forward mat and layered card but I made the sentiment in my Craft Artist graphics programme, the happy is Hudson 48.26pt and the 18th is Hudson 68.97pt, which were positioned together and coloured blue.
The swirly leaf die cuts were made of green card and covered with Glamour Dust glitter and left to dry before attaching to the card.
The lace is a heavy lace and I doubled it up to get the depth I needed.
The pink gingham bow is a slightly thinner ribbon than the gingham used across the lace but this is only because the bow was already made and in my scrap box.
 
My friend`s daughter was 18 last Friday and she said that she loved the card and had a really good birthday weekend. I think all birthdays should be on a Friday and last all weekend.
 
................................................................................................
 
I had a parcel delivered yesterday, it was from LC Designs and had a new butterfly stamp in it so I went straight to my craft room and made a card with it. I have loads of ideas how to use it and I want to do another make with it today. So I hope the stamp goes on sale soon so that I can share my makes with you.


Tuesday 4 October 2016

Love is in the air 3

Hello lovely crafty friends and here I am with the 3rd and final wedding invitation sample that I made for a friends wedding. As you already know the couple wanted a Peter Rabbit theme and I made this card to give them a more traditional look. I love how the card turned out but it was fiddly to make and I prayed that they didn't chose this one as I didn't want to make it another 35 times.

 
what I used:
Crafters Companion Peter Rabbit CD ROM
circle dies - one slightly lager than the other
Spellbinders fancy edge dies
blue base card 17cm x 12cm
white pearl card
blue satin bow
 
I cut the blue base card with the plain shaped edge die to cut the fancy shape to the front of the card (these dies come as a set of fancy and not so fancy dies) .
I then used the fancy cut away die on the white pearl card to make the lacy effect and then trimmed and stuck this down to mat and layer onto the base card.
I opened the Peter Rabbit image in my graphics programme (Craft Artist) and re sized it to  6.75cm from top to bottom. I always like to try to get as much of my printing done on the same piece of paper so I wrote the words Wedding Invitation in Zelda 28.14pt and left enough room between the words for the topper to be placed. I printed out the designs onto good quality mat print paper.
The wording was mat and layered onto blue card and stuck into place.
I cut the Peter Rabbit image out using the smaller of the dies and mat and layered it onto a s slightly lager circle of blue card and then stuck it onto the base card.
Finally I attached the blue bow.
 
I am happy to say that the card they finally decided to have is card No 1 and so I will be getting busy over the next few days making up the order.
 
                           ................................................................................ 
 
I am loving the way Autumn is turning out so far with sunny days and clear cold nights. Rosie was being naughty the other night and sneaked out after dark so I decided to sit outside and wait for her as we haven't got a cat flap. It was a cold but clear night so I got wrapped up in a quilt and set about to do some sky watching and I`m so glad I did because I managed to see two really bright meteors, so clear in fact that the first one made me jump. Rosie came home eventually after her night time adventure and we were both glad to get back into the warmth of the house.                  


Thursday 29 September 2016

Love is in the air part 2

Hello my crafty friends this is the second commissioned sample wedding invitation card I have made using the Peter Rabbit theme as requested by the bride and groom. Again I have kept the construction simple as I will be making 35 or so of which ever design is chosen so I didn't want to get bogged down with complicated techniques. There has been an update on this order so please tune in for part 3 when all will be revealed.

 
what I used:
Crafters Companion Peter Rabbit CD ROM
NitWit Lovestruck Too paper download
white linen base card 12cm x 17cm
circle die
eyelet circle die
pearl heart and blue satin bow
 
I use Craft Artist when I am printing and I find it really easy to map out designs on the computer
screen before I ever print them which is a good way to minimise wasted ink and paper.
 
Open up the NitWit papers needed in Craft Artist and trim them to just a bit lager than the size required. Open the Peter Rabbit image and re sized it to 6.75cm from top to bottom. Write the words Wedding (and again separately) Invitation in Piranesi It BT 36.4pt font, arrange the words as in the picture and group the words together. Arrange the images to fit onto the page as best you can (you may need to carry some images over onto another page as they may not all fit onto a A4 sheet of paper) and print the page onto good quality mat photo paper.
The rest of the card construction is simple die cutting and mat and layering from here on...
 
 
........................................................................................................
 
 
I have been lad low this week with a wretched cold so nothing much has been done in the house or craft wise and I feel quite guilty. It looks like the weather has finally turned more Autumney and I do love Autumn its my favourite time of the year, its the colours, the smells of fires burning and less biting things in the garden. Yesterday I mowed the lawn hopefully for the last time this year and today I must get out and tidy up the planters and divide some plants in the garden ready for next year. I wanted to do a bit of crafting today but at this time of the year you have to make the most of any dry days and then tomorrow I`m back at work. So as the days are getting shorter I feel that the weeks are too, I just don't know where the time goes. Whatever you are doing with your day I hope you have a good one.


Tuesday 27 September 2016

and on a personal note

Hello crafty friends, I am bursting with excitement and wanted to let you all know that I have been asked to be a member of the Crafters Companion design team. There are 11 of us new DT ladies who will join experienced DT already working for Crafters Companion and 3 new clever Spectrum Noir ladies who will be doing magic with their pens. This means that you will be seeing me using their fabulous products much more on this blog as I will be making samples for their TV shows. I will still be working for LC Designs when they require samples but I think the majority of my DT work will be with Crafters Companion. I am just waiting for them to give me my first project and then I think I will be in crafty heaven. It`s true what they say you don't get any where if you don't take that first step and I`m so glad I did.

Crafters Companion have begun celebrating their 11th birthday which is in October and will be having fantastic competitions and give aways between then and now so keep a look out for the celebrations on their Facebook page and on Hochanda TV.

Thursday 22 September 2016

Love is in the air - part 1

Today I am sharing with you the first in a commissioned set of cards that I have been asked to make for a friend who I used to live next door to. Alan is getting married in April and asked if I could do some sample cards with a Peter Rabbit theme as his marriage to Barbie is taking place in the Lake District so my first thought was that Peter Rabbit would be under copyright, it is but fortunately Crafters Companion do a CD ROM which I used to print off the image. I have kept the card simple as I may have to make 35 of them and I didn't want it to be like the painting of the Cysteine Chapel.

 
what I used:
Crafters Companion Peter Rabbit CD ROM
NitWit Lovestruck Too paper download
cream linen base card 12cm x 17cm
fancy edged die about 8.25cm x 6cm
Tim Holtz Faded Jeans distress ink
blue satin ribbon
ring binder hole punch
 
I use Craft Artist when I am printing and I find it really easy to map out designs on the computer
screen before I ever print them which is a good way to minimise wasted ink and paper.
 
I opened up the NitWit papers that I needed in Craft Artist and trimmed them down to just a bit lager than the final design so for the hearts paper I made it 6.5cm x 18cm and the blue paper is just big enough to punch the two dots - say 2cm square.
I then opened the Peter Rabbit image in Craft Artist and re-sized it to 6.75cm from top to bottom.
Finally I wrote the "Wedding Invitation" script in Palazzo Werk at 26.38pt and drew a black line box around the wording.
I arranged the images as best I could to fit onto the A4 paper sheet and printed them off.
The rest of the card is simple, I just die cut the Peter Rabbit image and shaded around the edge with Tim Holtz Faded Jeans distress ink, then attach the satin ribbon to the cut to size printed paper panel, punch out two holes from the blue printed paper, cut around the sentiment box making sure to keep the black line and then simply stick everything in place onto the base card.
 
I will show you the other two designs over the next few days, I have my favourite and also one that was a complete pig to make so I hope he doesn't chose that one. Alan has said he definitely wants to use one of the designs but hasn't decided which one yet so fingers crossed that he doesn't chose the difficult to make one.


Wednesday 21 September 2016

Sisters are the best gift your parents can leave you

Hello crafty friends, I`m sorry its been a few weeks since I posted on here but I have had my sister come to stay with me (which was fantastic) and then it was back to work as the school holidays ended (not so fantastic). I have been making a few commissioned cards which I will share with you later on but for now here is a Birthday card I made for my sister a few years ago after we had a fantastic day shopping at a craft show in Harrogate and she had said she liked this stamp. I do love trips out with both of my sisters and I think myself very lucky that we are so close and share the same interests.


what I used:
Woodware Leaf Quartet stamps
Woodware sentiment stamps
Tim Holtz Distress Inks - Broken China & Picked Raspberry
ink dusters
clear embossing stamp pad
black embossing powder
Glossy Accents
pink and black papers from my stash
 
The image panel on this card is so easy to make and I did it by first stamping and embossing the leafs onto white card which I then cut to size and coloured using the Tim Holtz Distress inks and ink dusters (it was the first time I had used ink dusters and they are really good for seamless blending of big areas like in this card). Finally I spritzed the topper with water to make tiny water spots.
The sentiment is stamped and embossed onto the pink paper and then the whole thing is mat and layered onto the base card.
Finally I used the Glossy Accents to make a feature of the swirly circles on the hearts.
 
Pauline was thrilled with the card and we went on to have a few more shopping trips at craft fairs but as I have moved away from her I have missed out this last year. Fortunately for me she is coming to live near me here in Lincolnshire soon so we can pick up where we let off and we have lost shopping time to make up.


Friday 2 September 2016

Manchester United snow men!

Well I`m not sure if they are off to see Manchester United play but they are certainly wrapped up warm with their scarves and hats. This is an quick little card that I have made using another of the LC Designs Dinkies which are still on offer at the moment and being snow men they are really easy to colour in. I love the little snow ball at the centre of the bow, I have had them for ages and keep forgetting about them but luckily this time I remembered. I was really lucky with the clouds as I bought them not thinking about their size but they are quite small and just right for this little card.
 

what I used:
LC Designs Dinkies Row of Snowmen stamp - £2 or on offer 4 for £6
LC Designs Dinkies white scalloped cards - £1.99 for 20 includes envelopes
Memory Box Stitched Cloud Trio  99506
ribbon and snowball embellishments from my craft stash
 
....................................................................


I keep thinking its Saturday and as I am working in the refreshments tent at the Lincolnshire Trust for Cats open day on Saturday I`m really confused. I have to bake some cakes to take to the open day so I`m glad in a way that its raining as I wont be distracted by the nice weather and end up pottering about in the garden. Whatever you decide to do I hope you have a good day.
 

Friday 26 August 2016

All the colours of the rainbow

This is a simple card I have made using another of the LC Designs dinkies stamps which are on offer. I thought all those Butterflies called out for lots of colour and I used just about every one of my pens to colour them in. I don't like Butterflies or Moths and as Butterflies are so popular in crafting I see them as scary or not scary, I cant even use a Butterfly that I think of as scary but as you can see these are definitely not scary.


what I used:
LC Designs Dinkies Butterfly Tree stamp - £2 or on offer 4 for £6
Lilly of the Valley stitch stamp set
Tonic heart punch
small hole punch (to make dots on sentiment tag)
red linen card
various satin paper scraps from stash (to make hearts)
pink embroidery thread
 
.............................................................................
 
 
I bought an air bed a week ago because my sister is coming to stay and I was dreading inflating it as I had read lots of horror stories about air beds not inflating properly and being lumpy and I didn't want to have to send it back, my usual worrying about something before it happens. I thought I had better inflate it and guess what it worked just fine. It only took about 30 seconds and it is so comfy, panic over. I am going into town to get some bedding for it today but that will be a nice shopping trip, just a shame there are no craft shops in town. I do hope you have a good day whatever you are doing.
 

Wednesday 24 August 2016

Pinterest interest

Hello there, this is a card which I made a few days ago and put on Pinterest but didn't get around to writing it up on here and I have had quite a few saves on Pinterest so it seems to be a popular one. I just love Pinterest as a source of ideas and I get quite a lot of inspiration from it when I`m having crafters block. This card features a LC Designs dinkie stamp which is still on offer at the moment and also a Creative Expressions die which comes in three parts, I have used the Holly die but there is also a Poinsettia die which I have used just as a flower on another card in the past (a very useful die).

 
what I used:
LC Designs DinkieRow  Robbin stamp - £2 or on offer 4 for £6
Sue Wilson Poinsettia and Holly Gemini die
Inkylicious greeting stamp
Opal Liquid Perls
Cosmic Shimmer Glitter Jewels - Iced Snow
red raffia twine and embellishments from my stash
 
I made the hessian hearts by sticking a piece of hessian to a piece of fairly thick white card, when the glue had completely dried I punched out the hearts and then painted over the top of the hearts with clear nail polish to stop the hessian from fraying away.
 
............................................
 
Well it was so hot yesterday but Stu and me managed to get the raised beds filled with soil but I didn't bother going to collect the horse manure as the soil filled the beds, I think I will give it time to settle down and then put the manure on. We have to put some plastic sheeting over the beds so that R&R (the cats) don't use it as a big litter box, I don't want that kind of manure going in there. Stu has got some tomatoes already from the plants that he just planted for fun around the garden and I think we will be having them in a salad tonight as it is looking like another hot day today. I`m doing my half day in the Lincolnshire Cat Trust shop this afternoon so I cant wait to see if they have any bargains and meet the lovely people who come to the shop. I hope you have a good day whatever you decide to do with it.


Tuesday 23 August 2016

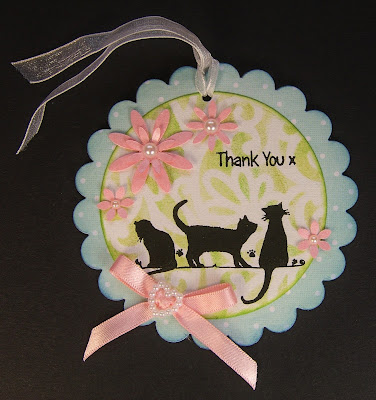
Leftovers cat tag

Hello there crafty peeps, today I am sharing with you a quick and easy little tag I made a while ago but I had to sit on it as the stamp set has only just been launched. I said in a previous blog that I wanted to make more tags as it is a good way to use up left over scraps and this tag is entirely made from scraps from my craft stash.

 
what I used:
LC Designs Dinkie Text Sending Smiles - £2 or on offer 6 for £10
Imagination Crafts stencil template
Tim Holtz distress inks - Shabby Shutters & Mowed Lawn
circle die & slightly lager scalloped circle die
various flower punches
papers, gems and ribbons from craft stash
 
I made the template background ages ago for a card and then didn't use it so it has been in my craft stash and I finally found a use for it, hurrah because it is lovely. I really must start using more templates as they are so much fun to work with and I just love it when you lift the mask and a lovely pattern is revealed.
 
..........................................


I really want to do some crafting but the sun is shining and I must go out and do a bit of gardening as we are making some raised beds so that we can grow our own veggies next year. Stu has already made the beds so he needs me to fill them with soil and manure (think I`ll need a bath after that lot). I hope you have a very productive day whatever you do and I hope I have a bit of time left for crafting later on.


Friday 19 August 2016

Green is my favourite colour

Today I can finally share a card that I made quite a few weeks ago but the stamps have only just been launched today so I had to keep it under wraps. If you remember I got some Brushos and had a bit of a disaster with my first attempt at using them but this background was what happened on my second attempt, it turns out I was using them all wrong and so I am lucky that I managed to salvage this background and use it to some effect for this card. I love this new stamp set from LC Designs, well it has cats so that's all it takes to make me happy and I really like the vibrant green colour that the Brushos have made. To launch the stamp set it is being offered at an amazing price of £5 instead of its usual £6 and I have put the official flyer at the bottom of this post so you can see what great value it is.


what I used:
LC Designs The Purrfect Combination stamp set - £6 or on offer for £5
Brushos - lime green & olive green
yellow pastel chalk
6" x 6" base card
lime green linen card
black mat card
mottled green paper from stash
teal satin ribbon from stash

I made the background first by putting the lime green and olive green brushos onto card and spritzing it with water (I put far too much brusho and water onto the card and I ended up having to dab at the brusho with a wet wipe as it just clumped together).
When the background was dry I stamped the tree image and then I cut the image topper down to size. I had some clear white card showing in places and so I lightly coloured this in using the yellow pastel chalk.
The rest of the card is simply mat and layering and the sentiment is part of the stamp set and is just purrfect for this card


Thursday 18 August 2016

Ribbons make a world of difference

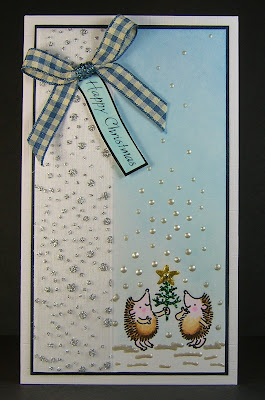
Hello everyone, I am sharing with you another Christmas card made using one of the LC Designs dinkie stamps which are on offer at the moment and this card shows you that even though the stamp is small you don't have to make a small card with it. Small stamps are definitely useful because you can make a large  card like this but then the stamp is small enough to use on a tag too. I am always looking at ribbons in shops, at markets and every now and then Brenda Exeter has a FB ribbon sale which I simply can`t resist so I think its fair to say I am hooked on ribbons and always like to put bows or ribbon on a card if I can. With this card I think the ribbons make it, especially the sheer/sparkly ribbon which I bought at one of Brendas sales.

 
what I used:
opal Liquid Pearls
gold Liquid Pearls
green Stickles
sheer/sparkley ribbon 1 1/2" wide
blue gingham ribbon and sentiment from stash
 
I cut a piece of card 3 3/4" x 6 3/4" and stamped the image on the bottom right of the card.
I masked the Hedgehogs, the star and 11/2" from the left of the card, then I shaded the image background using pastel chalks going from dark at the top to light at the bottom.
I removed the masks, coloured the image and used the Stickles and Liquid Pearls to colour the star, tree and snow (I added more snow dots than were stamped further up the card).
I wrapped the sheer/sparkles ribbon over the left side of the card and secured it at the back.
The topper is now finished apart from the bow and sentiment and ready to mat and layer onto your base card which in this case is 4 1/4" x 7 3/10".
 
Securing sheer ribbon is always a problem as glue and tape always show or even worse turn yellow so I thought making a topper was the best way of doing this but if you have a product that works for you please tell me about it.

A few days ago I had another parcel of Brendas lovely ribbons arrive and I am just itching to start using them (when I`ve stopped stroking them).


Wednesday 17 August 2016

Making time for Christmas

Hello lovely people, I have been really busy this week what with trying to keep on top of the gardening and housework and then watching the Olympics and reading a book which has hooked me. Summer really is a busy time of the year and I can hear the farmers cutting the hay and harvesting in the fields around me so I guess they are far busier than me. My crafting took a back seat for a while but I managed to make this Christmas card on Monday using one of the LC Designs dinkies which are on offer (4 dinkie stamps for £6) and although I would not normally use a nativity scene on one of my cards I am quite happy with how this one has turned out.

 
what I used:
LC Designs Dinkies Nativity Stamp  - £2 or £6 for 4 on offer
NitWit Frosty Christmas paper pad
Creative Expressions Sue Wilsosn Festive Collection Poinsettia Additions dies
Tim Holts Walnut Stain distress ink
hessian and embellishments from my stash
 
I stamped the nativity image with Tim Holts Walnut Stain distress ink and then used a water brush to drag the ink onto the image to help shade it. I used various other shades of brown distress inks to add further detail and finally I used scattered straw distress ink to shade the floor. I coloured Marys head dress blue to match the NitWit paper but also I think that blue is used in classical paintings to symbolise purity and so is associated with Mary.
 
I love the Poinsettia dies and this is the first time I have used them but I think you will be seeing a lot more of them on my Christmas cards, a definite must have buy. 


Thursday 11 August 2016

A special friend deserves a special card

Its my best friends Birthday today so I had been planning her card for quite a while, for instance she loves her caravan so I wanted to include one on the card. I knew straight away when I saw this digi stamp from Lili of the Valley that I had to have it for Paulas card so then there was just the colour scheme to sort out and I got inspiration for that when I saw these NitWit papers which I downloaded and printed off (the colour of the papers should have been more lilac but I think my printer must be running out of blue ink because it printed these papers more maroon but that's OK they still look good, no mistakes in crafting.


what I used:
LOTV off in the caravan digi stamp
NitWit Lady Folk digi papers (uniquely coloured by my printer)
Marianne Designs LR0271 swirly leaf die
Happy Birthday die
flowers and ribbon/lace from my stash
 
 Ive just received a lovely text from my friend to thank me for the card so I`m glad to say she likes it.


Wednesday 10 August 2016

I`m glad I got this off my chest

Hello crafty friends, I`m sharing a card today that I`ve been itching to make for well over a week now but other commitments got in the way however because of a mechanical malfunction with the hedge cutter yesterday (it broke) I had free time and shot off to my craft room with a big grin on my face. You may remember a few weeks ago I had a play with my newly bought Brushos and the result was less than impressive but I managed to catch Lesley Wharton on TV demonstrating them and I had been doing it all wrong and using far too much paint and water. This fantastically colourful background paper is what happened when I used the Brushos how Lesley had shown and I have to say I now love them and cant wait to play with them again (I think Lesley is on TV on Friday with what looks like metallic Brushos or a metallic finish to the artwork so I will have to try and remember to watch). The stamps arrived over a week ago and I knew exactly the card I wanted to make with them and this is it. I love it when a plan comes together - who was it used to say that?


what I used:
Tim Holtz Crazy Birds stamp and stencil set
Brusho Crystal Colours - Sandstone,Yellow Ochre, Rose Red
Tim Holtz Distress Inks
 
I used the square stencil which came with the stamps and distress ink to make a background pattern on some plum coloured paper.
The crazy bird I just stamped and coloured using distress inks and cut around the image.
The balloon I drew myself and shaded it to look like the shading on the bird, this was easy as the crazy birds are all quirky and so whatever the balloon had looked like it would have worked. I cut around the balloon as I did with the bird.
I used black embroidery thread for the balloon string.
 
The technique that I saw on TV for using the Brushos was to put a hole in the top of the individual Brusho pots using a notice board pin and keep this pin in place when not in use. This hole makes the pot like a salt shaker and the colours are shaken onto white card (not too much colour as you can always go back and add more when the card is dry) and then spritz with water. My first attempts were flooded with water and this made the colours all run into each other and make a muddy mess so try not to over water the paper as you can always go back and add more water or more paint when the paper is dry.
 
I love this colourful quirky card and I am already thinking that I will turn the birds into Robbins and use them on some quirky Christmas cards so watch this space.......